Level 493 · Control Tower
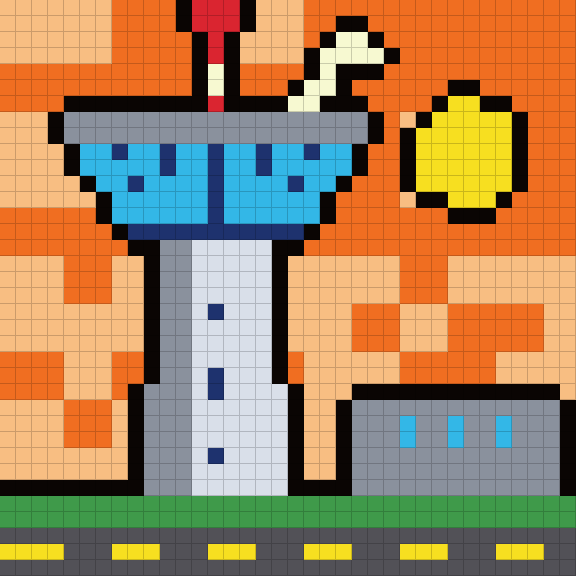
Control Tower is level 493 of Crumb Colony. The pixel picture has 1292 blocks in 12 colors, the tray holds 98 ant boxes, and the difficulty is Expert.
- Difficulty
- Expert
- Pacing
- All the way
- Blocks
- 1292
- Colors
- 12
- Ant boxes
- 98
- Mechanics
- 1 golden key(s) · Ice · Spider web (45 bites) · Mystery boxes
Like this pixel picture? BitBead can turn it into a printable fuse bead pattern.
Play level 493About the dish
The control tower at sunset: a concrete shaft under a ring of outward-leaning glass, a red and white mast on top, and the low terminal beside it.
How the picture comes apart
From the frame to the center the picture is 18 layers deep. The outer ring is mostly orange and tan, the middle band is mostly grey and orange, and the core is mostly white and tan. Ants can only reach the next layer once the one around it is gone, so the core colors are the last to become useful.
By block count the biggest colors are orange, tan and black.
The 1 golden key(s) are buried in the middle band of the picture, so the locks they open come into play around the middle of the level.
The spider web covers 30 cells in the middle band of the picture and needs 45 bites from soldier ants.
3% of the blocks are frozen and take two bites each.
Reading the tray
The tray starts with 98 boxes in 4 columns. At the start 2 of the 4 front boxes can bite right away: tan (bites now), white (has to wait), red (bites now) and light blue (has to wait).
Locked boxes start in column 2, row 27.
48 mystery box(es) only show their color when they reach the front.
4 soldier box(es) carry the bites for the web.
How the verified run plays out
The solution further down was played to the end in the real game, with ants walking and real timing. It takes 98 taps. The chart shows how many boxes were still parked in the 5 slots, waiting for their color, just before each tap.
Opening (taps 1–33): 34% of the blocks are eaten, with up to 4 of the 5 slots holding a box that is waiting.
Middle (taps 34–65): 33% of the blocks are eaten, with up to 2 of the 5 slots holding a box that is waiting.
Ending (taps 66–98): 33% of the blocks are eaten, with up to 4 of the 5 slots holding a box that is waiting.
A key comes out before tap 5. The web breaks before tap 45.
Strategy
Check the colors of the first three boxes in each column and compare them with the colors exposed on the outer ring of the picture. Always keep one slot free to catch a color that can't be eaten yet.
Tight from start to finish. Only take boxes that can send ants immediately, watch the second and third rows of the tray, and plan the next tap ahead.
Keys are buried in the picture and must be dug out to open the locks in the tray. Prioritize colors that eat around the keys so locked boxes don't block the front row for long.
Ice blocks take two bites, so one block uses two ants. Icy areas are eaten slowly and the matching boxes stay in their slots a little longer.
Nothing under the spider web can be eaten. Wait until the edge of the web is exposed before sending the soldier box (the leafy green one), or it just occupies a slot.
Mystery boxes show their color only when they reach the front. When you see one coming, don't fill every slot; leave room for it.
Strategy guide: reading the tray and keeping the nest clear · Locks and golden keys · Ice blocks · Spider webs and soldier ants · Difficulty curves
Step-by-step solution
This order of taps is verified to clear the level. Columns are numbered 1–4 from the left; after each tap, wait until the ants are out before the next one. Two boxes shown together are a chained pair taken in one tap.
Show the solution
- Column 38
- Column 324
- Column 39
- Column 310
- Column 39
- Column 323
- Column 39
- Column 314
- Column 223
- Column 216
- Column 19
- Column 112
- Column 131
- Column 18
- Column 116
- Column 118
- Column 214
- Column 223
- Column 27
- Column 210
- Column 217
- Column 216
- Column 211
- Column 23
- Column 218
- Column 232
- Column 216
- Column 29
- Column 210
- Column 217
- Column 28
- Column 28
- Column 258
- Column 210
- Column 232
- Column 211
- Column 212
- Column 28
- Column 28
- Column 224
- Column 213
- Column 219
- Column 215
- Column 28
- Column 110
- Column 113
- Column 115
- Column 110
- Column 118
- Column 110
- Column 115
- Column 16
- Column 114
- Column 115
- Column 15
- Column 110
- Column 116
- Column 32
- Column 39
- Column 334
- Column 31
- Column 312
- Column 331
- Column 38
- Column 316
- Column 21
- Column 210
- Column 213
- Column 211
- Column 214
- Column 213
- Column 212
- Column 213
- Column 235
- Column 216
- Column 212
- Column 213
- Column 113
- Column 116
- Column 16
- Column 127
- Column 116
- Column 315
- Column 316
- Column 313
- Column 318
- Column 38
- Column 311
- Column 32
- Column 312
- Column 49
- Column 410
- Column 34
- Column 314
- Column 214
- Column 416
- Column 313
- Column 411
Level 493 questions
How many taps does level 493 take?
The verified solution clears it in 98 taps.
Where is level 493 hardest?
It rarely jams at all; the challenge is keeping a steady rhythm. Tight from start to finish, think through every tap.
Do I need boosters for level 493?
No. Every level, this one included, can be cleared without boosters, and the step-by-step solution on this page uses none. Each booster you use costs one of the three stars.